
Say something...
Nothing found. Please repeat.
Unsupported browser. Sorry...
Japanese style toilets with personal hygiene system through flushing and air-drying, plus 15 other functionalities for a better experience. Automatic cover opening, remote control, app, heated seat, massage function, and customizable temperature and pressure parameters.
Smart bathroom mirrors with anti-fingerprint touch TV screen to access Google, YouTube, Spotify, Amazon and any App. Modern design and illuminated with LED light, anti-fogging system and 100% waterproof.
Say something...
Nothing found. Please repeat.
Unsupported browser. Sorry...


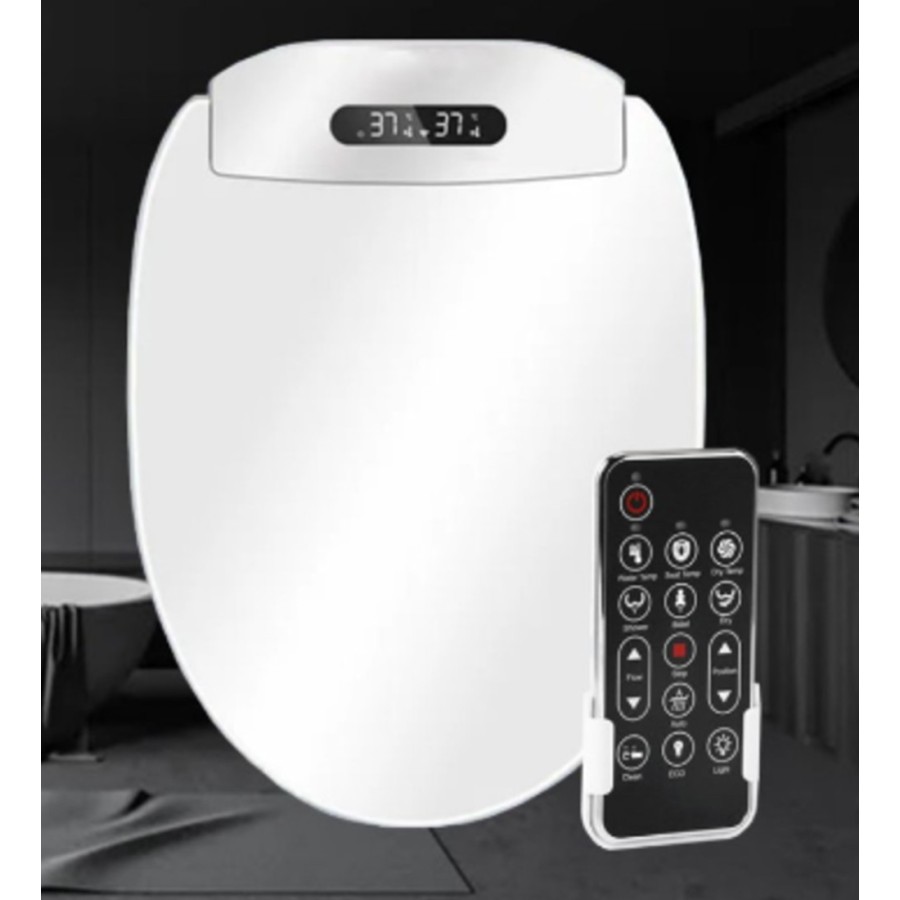
Cover-bidet with Japanese seat for toilets.
(Non-including toilet)
FREE SHIPPING IN SPAIN PENINSULAR IN 24H - 48H.- (Islands and other countries according to the order)
![]()
Place your purchases in 3, 6, 9 and 12 months.
 Telefonica assistance
For any query, call us on +34 911 940648 or +34 679 51 32 02
 Free shipping
Free shipping on peninsula with Express Posts.
 Express delivery
Express delivery in 24 - 48 hours on peninsula.
Our Privacy Policy explains our principles when it comes to the collection, processing, and storage of your information. This policy specifically explains how we employ cookies, as well as the options you have to control them.
Cookies are small pieces of data, stored in text files that are stored on your computer or other device when websites are loaded in a browser. They are widely used to "remember" you and your preferences, either for a single visit or for multiple repeat visits
We use cookies for a number of different purposes. Some cookies are necessary for technical reasons; some enable a personalized experience for both visitors and registered users; and some allow the display of advertising from selected third party networks.
Visitors may wish to restrict the use of cookies or completely prevent them from being set. If you disable cookies, please be aware that some of the features of our service may not function correctly
We only collect information about you if we have a reason to do so-for example, to provide our services, to communicate with you, or to make our services better.
We are committed to maintaining the trust and confidence of our website visitors. We do not collect, sell, rent or trade email lists or any data with other companies and businesses. Have a look at our Privacy Policy page to read detail information on when and why we collect your personal information, how we use it, the limited conditions under which we may disclose it to others and how we keep it secure.
We may change Cookies and Privacy policy from time to time. This policy is effective from 24th May 2018.
Covers with bidet of the VOGO series W, convert any traditional toilet into a Japanese style wc with water jet, drying and many automatic functions:
CHARACTERISTICS:
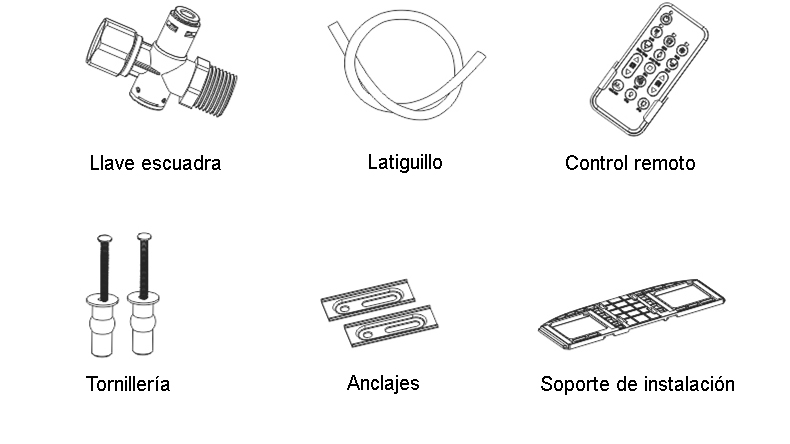
INCLUDED ACCESSORIES:

EMBALAJE:
Data sheet
Más practico que comprar un bater entero, aunque he temido que tirar un cable para poner la toma eléctrica al lado . Si que me hubiera gustado que se abriera y se cerrara solo con sensor o con mando. Me atendieron muy bien y me llegó al dia siguiente. Buen servicio!
Lo mejor que he probado en mi vida.
"CLICK AQUÍ PARA DESCARGAR LA FICHA TÉCNICA COMPLETA"
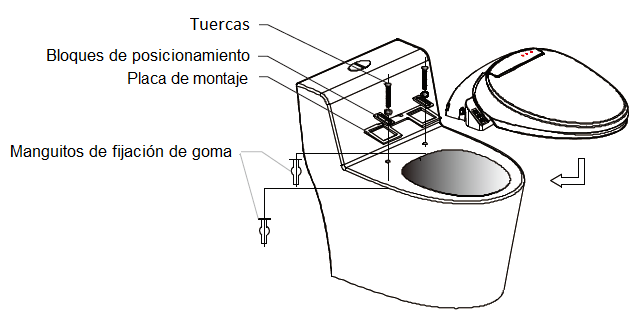
Para instalar la tapa inteligente es necesario disponer de dos elementos básicos:
Instale el asiento del inodoro

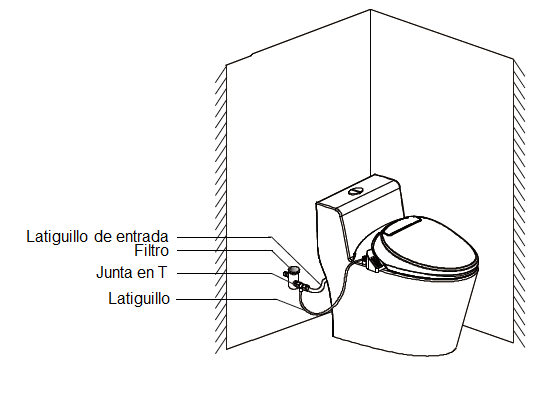
Instale la manguera de suministro de agua

Asegúrese de que todas las conexiones estén realizadas correctamente y abra la válvula de suministro (Llave escuadra).
Parámetros a tener en cuenta:
Call Our Store
Boxed:
Sticky Header:
Sticky Add To Cart
Sticky Footer:
Font:

